How To Build A Bridge
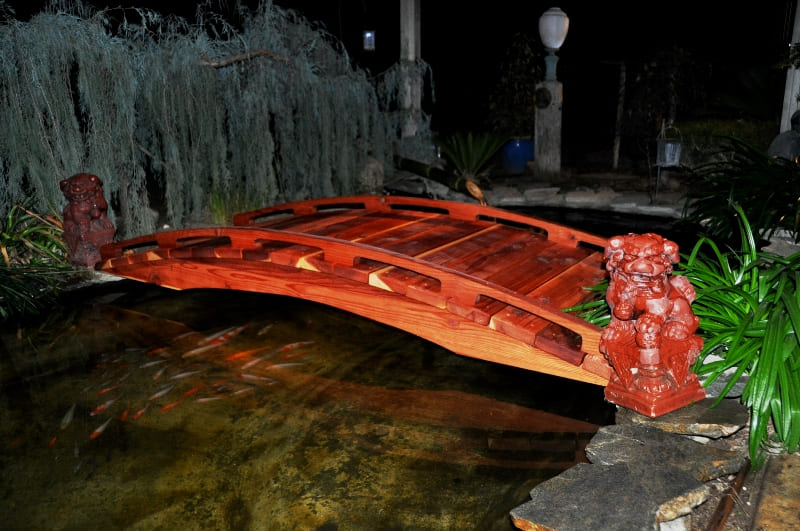
Discover why Redwood Garden Bridges are the world's best in design and craftsmanship.How to build a Garden bridge and a Low arched Footbridge.
Many are finding that, with craftsman Joe’s help, they are able to create works of art that they never thought they could, RedwoodGardenBridges.com is not only a place where you can purchase beautiful handcrafted Bridge but also a place where you can learn to make your own Bridge and discover the craftsman in yourself and have fun at the same time , Koi Pond Bridges.
You don’t need a degree in engineering, carpentry or some form to be able to construct a Bridge yourself as long as you follow craftsman Joe’s tips.The steps set out for you are based on any skill levl. They are easy to read and follow.
Part 1
Step 1
Determine a location for your bridge. The foundation of the bridge must be on solid, dry ground. Measure your space and buy materials.
Step 2
Place one pair of concrete pier blocks at each end of the bridge location. Dig down or build up in order to ensure that the blocks are level with each other.
Step 3
Connect beams to the pier blocks. Place the pier blocks one length of beam a part. Attach the beams using metal straps.
Step 4
Construct railing posts for each side of the bridge, if desired. Carefully measure the height of the posts to make sure they’re even. Set the posts in incremental spacing to ensure that the railing is supportive and strong.
Step 5
Lay planks across the beams to form the treads of the bridge. Cut the planks to a length that allows them to lay fully over each beam but not too far over the sides of the bridge.
Step 6
Attach hand railing to the railing posts. Measure the proper height and mark each railing post with chalk as a visual guideline, then firmly attach each hand railing section.
Step 7
Stain or paint and seal the bridge. Use a sealer specifically for use outdoors to prevent dampness from ruining the wood and destroying your bridge.
Part 2
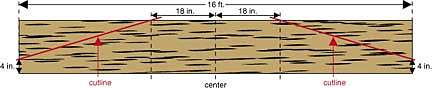
- Use 16′ 2x12s for the stringers. Square both ends of a 2×12 and cut it exactly 16′ in length.
- Measure up 4″ on each end of the 2×12 and make a mark. Locate the center of the 2×12, measure 1 1/2′ (18″) toward the left and right ends, and mark. Draw cut-lines between the marks as shown below.
- Use a circular saw to cut the stringer along the cut-line. Use the first stringer as a pattern to mark and cut the other stringers.
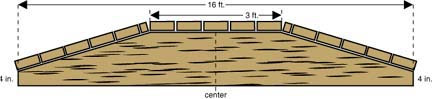
Marked stringer
- Cut 2×6 decking boards to 36″ for decking.
- Center the decking boards on the stringer frame so there’s about an inch of overhang on each side. Secure the deck boards with two screws at each stringer. Leave a 1/8″ to 1/4″ gap between each decking board. It may be necessary to cut decking boards to fit where the incline flattens out on the bridge.
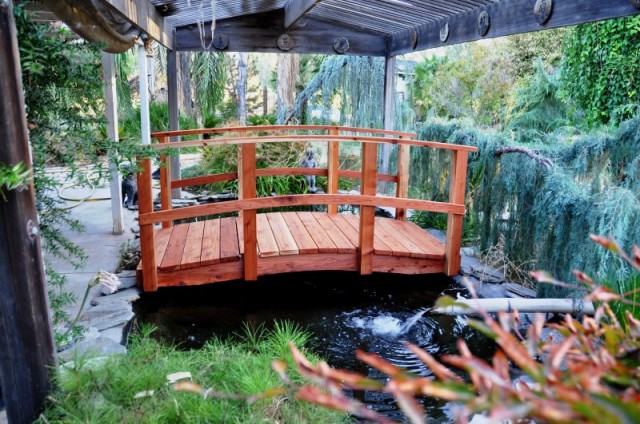
For this Garden Bridges , we decided not to install railings. In most areas, structures under two feet high are not required to have railings, but always check with your local building inspector for requirements in your area. If your local code requires railings or if you would like to add them to your bridge.
As always I am here if you have any questions.
More Plans that might work good for you.
Award winning Garden Bridges, on Google.com for 20 years, Houzz best and most reviewed bridges, Built just for you, all Styles & sizes, Nationwide shipping.
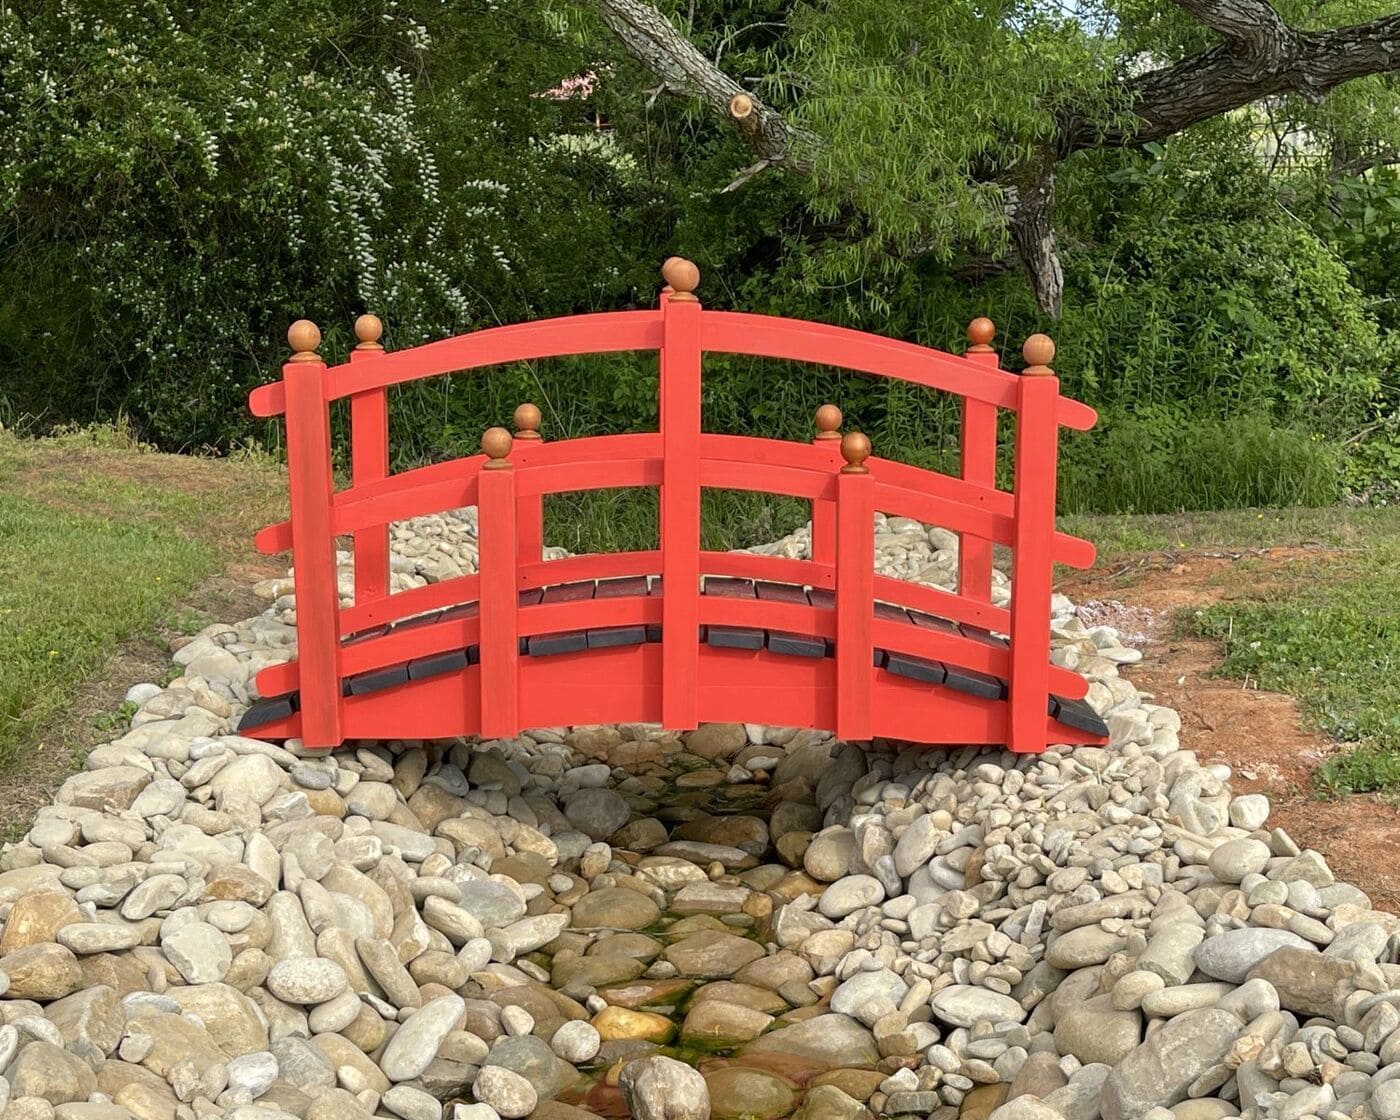
My wife had casually mentioned that a footbridge over the dry creek bed drainage culvert we created in the front and in the back would be a nice feature.
I decided to surprise her and built the bridges in one day. I used 2×12 lumber for the sides, cut the arch shapes out with a jigsaw, and then transferred that shape to the other side and cut it out too.
I left a flat area on the bottom side at each end where it would rest on the ground. The only limit to design on the cuts is your imagination. If you don’t want a tall bridge, or if it isn’t spanning a wide area, you could use 2×10, 2×8 or even 2×6 lumber.
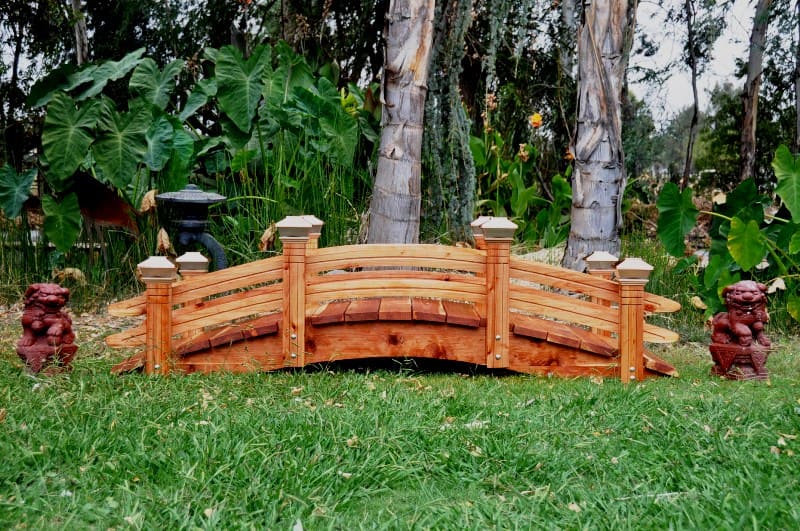
I made mine 6 feet long and 24″ wide, and used 2×4 and 2×6 boards for the decking, and a 2×6 vertical support in the center to give it more rigidity. I used a square to make sure the board sides and ends were perpendicular and parallel.
I used redwood . If you want to make a smooth arch shape, you can use 1/2″ PVC pipe, bend it to the shape you want, screw it to the board, and then trace out the curve on the board.
The bridge is very sturdy, and looks pretty good too. Of course, you could use 2×8, or even 2×6 side boards, depending on the span and how you cut the side boards.


Have a Unique Garden Space?
Tell us what you need — we’ll help you design a handcrafted Koi Pond bridge that fits your space perfectly.
Curved Rail Garden Bridge
Short Post Bridges W/Solar lights
Japanese Garden Bridge
Asian Inspired Wooden Bridge
No Post Wooden Bridges
High Arch Garden Bridge
Moon Garden Bridges
Basho Japanese Bridge
Half Spindle Garden Bridges
Spindle Garden Bridges
Swimming Pool Bridges W/Steps
Pedestrian Wood Bridges
Traditional Japanese Bridge
40ft Wooden Bridge
SunBurst Spindles Bridges
3D Videos Garden Bridge
Monet Garden Bridges
Custom Koi Pond Bridges
Red Wood Bridge
Large Garden Bridges
Trex Composite Bridge
Country Style Garden Bridge
Routered Heavy Duty Handrails
Torii Gate
Ranch Bridges and Farm Bridges
Tractor Wooden Bridges
Horse Trail Wooden Bridge
Wedding Garden Bridges
Post Caps Garden Bridges
Solar Power Light Caps Garden Bridges
Koi for Sale in Fresno ,CA
Flat Wooden Garden Bridges
Archive
How to Choose the Perfect Bridge
